Wednesday, 27 July 2011

Part II Sewing the Kimono

Well, I really haven't the slightest idea what Burda thought I was going to do with their instructions. I have to buy my copies in French, but when the instructions just break out into German accidentally, I sign off.


So I just got out my antique kimono, which is exquisite and figured it out from that. Also, I wasn't using finished lace so Burda's instructions regarding keeping the lace hem distinct from the lining weren't applicable. If you are using lace, you won't want your seam margins of the lace showing through to the outside, a mistake I see a lot of girls making when they back lace shift dresses. So in that case, you would stitch lace and lining together in one seam (lining used as underlining, technically) and finish the seams on the interior.

First, I stitched the front and back long edges of the two side inserts to the body fronts and back,
then both shoulder seams for the basic shell.

I did the same for the lining.

Notice the the interior of my Tokyo original has no open seams or even French seams but is completely enclosed. So this became my goal as well—no visible seams surplus. In the end, I was able to sew the entire Burda kimono using my machine, except for closing the interior edge of the bands and the hem. I have to tell you, though, that my antique is completely hand-stitched, so that's not only okay, but mega-kosher.

Now for the rectangular pocket sleeves, the key feature of any kimono. 


1. Sew the botton seam of each sleeve part to make a closed circle, i.e. two tubes of lining and two tubes of velvet.
2. Taking each piece separately, sew closed the outside edge of the sleeve down from the notch to the bottom seam. Leave open the upper part of the sleeve on both sides where your arm will emerge. This seam meeting the bottom seam at right angles is the beginning of the  deep rectangular sleeve cachement where you will hide your love letters. You'll do this for both lining and velvet = four pieces.

3. Now you're going to connect each sleeve to its lining at the outer armhole, laying the lining and shell of a sleeve right side to right side, stitching around the outer armhole, velvet to lining, and then turning the sleeve right side out.

4. You've now got two sleeves instead of four pieces. Push the lining, right side facing out, into the bag of the velvet and make sure the closed outer lower corner of the lining nestles neatly into the closed corner of the shell.

5. You're going to finish their lower inner edges, lining to velvet, below the armhole notch before attaching the sleeves to the body. Pin the lining to the shell, right side to right side, stitching from front to the back, so that when you turn it back out, you have a closed seam of velvet to lining below the notch, but an open loop of sleeve unlike the opposite lower "closed bag" corner. Above the notch, you have raw sleeve edges in both velvet and lining. Put the sleeves aside.

6. Now you have to finish the lower half of your body's armhole before attaching the sleeve. There is an open "breathing" area between the sleeve and the body at the lower half, and you shouldn't be trying to attach the sleeve to the body all the way around. You want what I'll call an "armpit window" for lack of its Japanese term (which is no doubt far more poetic around Tokyo's tailoring shops.) Notice what I'm calling the square "jog" at the top edge of the body's side insert, underneath the armholes of both the authentic kimono and the Burda design:


And take note: your armpit window must make two sharp corners where both sides of the side body insert meet the front and back. So sew right side to right side, in three hops, breaking your stitching at the seams you've ironed flat beforehand. Don't cheat by trying to just stitch your way around the corners.
(The Kimono Gods are Watching.)

Turn your kimono body inside out and breathe deeply, reciting the words, "Toshiro Mifune" ten times. Press well.

6. Now, stitch the upper half of the velvet body armhole to the upper shoulder edge of the velvet sleeve, leaving the lining of both to be finished as a last step, (also by machine.) The best way to pin and stitch the linings right side to right side was by coming up between the layers from the open hems.

7. The rest is straightforward, as you've got only the raw front edges and bottom hem edges of the kimono to worry about. If you're using lace, do whatever Burda says. The bands are sewn along one long edge to the kimono edge, turned and pressed halfway, edges turned in again once the seams are pressed band-ward and enclosed and hand-stitched or topstitched.

(If you're top-stitching your kimono band to avoid hand-stitching the whole band down, well, I know you're tired, but it won't impress the Sushi Authorities at all.)

 Make sure when you finish your band, you attach the ties at the inner edge on the inside and that they peek out from behind the width of the band. Do not, repeat, do not, attach your ties at the outer edge of the bands somehow. No, no, no, no, no. I know it's not logical.
It's Japanese. But actually it makes sense, because when you wear your kimono untied, the ties dangle down invisibly inside.

9. Finish the hem any way you want. You've earned it. If you want to bag the hem somehow, well, that would be grand.

Notice that the ties on my Tokyo garment are actually looped through a loop on the garment, so that they swing nicely down out of the way when the garment is worn open. I stitched my little ties and turned them inside out and felt like I was making real progress, because I hate turning little ties, especially when using velvet! But silk velvet turns like a dream. Also, btw, silk/rayon velvet presses like a dream. But when I attached them I simply hand-stitched them down well inside the band.

Part III The finished blue velvet kimono


Sunday, 24 July 2011

Part I: Kimono Dressing, a primer inspired by Burda 124 July 2011

So Deska! This is a long post, so make yourself some green tea and order up the sushi for tomorrow's Part II.

While we're on the subject of kimono dressing, inspired by CyberDaze's full-length kimono, I was reflecting on my past with kimonos. What do we do need to know about kimono dressing and as our Sewing Objective goes, Making It Our Own?
Hmmmm................
I'm lucky enough to have been given a real antique Japanese "short" kimono by the parents of my model (literally!) god-daughter when they were posted for a few years to his branch office in Tokyo. It's made of heavy crepe, with hand-painted gold accents on the stylized flowers, has a braided and embroidered tie rotating on a little loop at the center front and contrasting silk yellow patterned lining.


In making the Burda kimono, my cherished antique served as a hands-on guide to finishing the inside (the Tokyo garment was made entirely by hand,) as well as the authentic little square jog across the side insert under the large square sleeves and open armholes, which makes the Burda 7/2011/124 model really quite authentic:
 I'll talk details with photos of the construction of this antique kimono and my blue velvet Burda project in Part II. 

But before we do any actual work, (ugh,) let's get inspired!

Obviously it's all about sleeves, this kind of dressing. Promise me that if you do follow my example and make the Burda kimono, you won't cook over a gas flame or set a candlelight dinner in this garment. (I know, I sound like Billy Connelly in Muppet Treasure Island saying, "Jimmy, Jim, Jim, beware....running with scissors or any other pointy objects," but I mean it! You can see why:


We're going for lady of leisure here, and obviously, the sleeves are the point. Notice that none of these Honourable Models is anywhere near an open flame.
Safety lesson over.
Here's an Elle styling of a Chinese dressing gown capturing the slightly louche effect one seeks. How do I know it's Chinese? The sleeves.


Different generations do this look their own way. Notice this designer pattern from the 1980's where Oscar de la Renta took the feeling and flow of a kimono but chickened out when it came to the traditional square sleeve.


Then  in the 90's the Platts gave us a wonderful pattern, in varying lengths, which I sewed up in a livid red, yellow and black Chinese silk:


Notice however that the Platt duo also chickened out when it came to the traditional Japanese rectangular closed sleeve, although they got as far as the shape. The result, open at the bottom hem, gives a fluttery butterfly effect. Also, they cheated us of the authentic square cut jog at the armhole underarm and skipped the side insert which makes it possible:

However, Vogue Patterns mag devoted an entire article to possible embellishments of the banding on this pattern.


If all of this "flow" seems a little overwhelming, there's a more slimming version of this look from across the sea. Veering away from the kimono T-shape, Marcy Tilton explored a Ching Dynasty-feeling embroidered Chinese mandarin robe on the left, with a modified kimono option on the right, (notice the difference in collar and hem treatment) inserting real feathers into boxes stitched into plain organza, which I think is pretty cool, but never had the guts to try:

I sewed the right hand version up in Jim Thompson silk brought home by my husband from an Int. Red Cross mission to South East Asia:


Mixing prints is very much in order when referencing Japanese style. Here I've belted my interpretation of the Marcy Tilton robe with a second Jim Thompson scarf of the exact same rough silk texture, echoing the darker print:
Can you mix prints like that? Look at this fabulous photo from Elle a few years back which matches the sweet pepper red in both chiffon dress and silk crepe kimono to make a wonderful combination, even adding patterned stockings with abandon.


To their credit, Burda has grabbed the kimono nettle, giving us the real deal complete with the little tie in front— just like on my authentic gem— and the box sleeves closed along the bottom hem. If you know your Lady Murasaki's Pillow Book and her lover Prince Genji lore, ladies, you know that this deep sleeve pocket is there to hold love letters, mementos and various romance toiletries on the run. I won't go into details on that last one.

Sort of the ancient Asian version of the Burda Travelling Cape with deep pockets, come to think of it!

Ready to Sew? Move right on to Part II of this Primer (next post) on construction, sayonara!

Friday, 22 July 2011

Trust a Parisian with the name of a heroine

Now Carlotta Stermaria (which is a very glamorous name, btw) in Paris kindly located the original of Miu Miu's poodle pants off style.com, which were copied in the Burda August edition coming up. Will this trigger a queue of wannabe poodlers at the newstands?

With heartfelt thanks to Carlotta for hunting down this reference, I have to say sorry, MM, all the shiny belting in the world hasn't sold me yet on this bizarre silhouette. I can't quite make out the bodice decorations, but they might be medals for fashion bravery?

Saturday, 16 July 2011

Are they kidding? Burda joke trousers or (thks Val!) Poodle Pants!

Here I was, thinking that Burda was on a really beautiful roll, with their lace tea dresses, military jackets and the Travel Cape for the Terrorized by Security at Airport, when they give us these flounced skinnies in the full preview of their August edition. I wouldn't leave the house in these, but maybe I'm missing something here? Are they all the rage in Polish clubs? German Soccer Mom gabfests? English Yummy Mummy school runs?
I will send a free copy of A Visit From Voltaire to the first gal who makes these. Promise. (And yes, I mean the trousers on the left, not the right. No cheating. And I'll make a gender exception for Male Patttern Boldness.)

The velvet kimono is cut out and interfaced...

Monday, 11 July 2011

Burda's August looks offer Travel Cape. Handbag, officer? What handbag?

Can't say I'm bowled over by the August Burda preview, but I like the post-Balmain echo of the ruffled blouse under a military jacket with tight jeans, above. Both the blouse and jacket are in this issue, I think.

Then I have an observation which I hope will be of use to those of us flying cheapo airlines around Europe. Have you noticed that Luton Airport and others don't even let you carry a handbag on board, in addition to your carryon? Cruel and unusual punishment for would-be terrorist ladies in their later years fumbling like near-sighted bats at security to stuff their handbags into their carryon's at the very last gate.

YES, I have a solution! Wear a raincoat or this cape with its very capacious pockets, for your camera, mobile, tickets, hairbrush, makeup bag, and everything else you would have put into that handbag. And you sail through security, essentially having disguised your handbag as a garment! For this, Burda has given us the perfect throw cape. Notice the two pockets. I bet they could store even an Ipad.

shifting projects and fabric around, Burda July 124 kimono coming up


Because of our family medical issues and various distractions, I bombed/failed/epically let down the Vintage SewAlong gang. However, in waiting to get back to the sewing room, I played around with the velvet I'd dyed for that project and realized that three layers of velvet meant it was too thick to tie and drape properly in the Adele Simpson Vogue design I'd chosen without looking like I'd grown a huge royal blue barnacle on my lower tum.
 I've decided to order much slinkier crepe de chine for the Vintage dress, and meanwhile use the blue velvet and matching silk lining for the Burda kimono design, above. I've always been a sucker for kimono dressing, and years ago made two Vogue kimonos from a now-discontinued pattern, I am also the happy recipient of an authentic antique Japanese kimono from friends in Japan which I've worn for years when entertaining at home. I adore the kimono CyberDaze sewed for herself recently, too, because it signaled to me that the world of sewing people much cooler than myself was giving the green light to kimonos, which really haven't been "in" since Noel Coward and cigarette holders held sway.
One of the quirks of my protagonist in the Handover Mysteries, the journalist Claire Raymond, is that she collects antique kimonos and Chinese dressing gowns for relaxing away from the newsroom. That's one of the great things about writing fiction: your imaginary world is streaks ahead of your terrestrial limitations, especially when it comes to wardrobe, lovers and happy endings.

Thursday, 16 June 2011

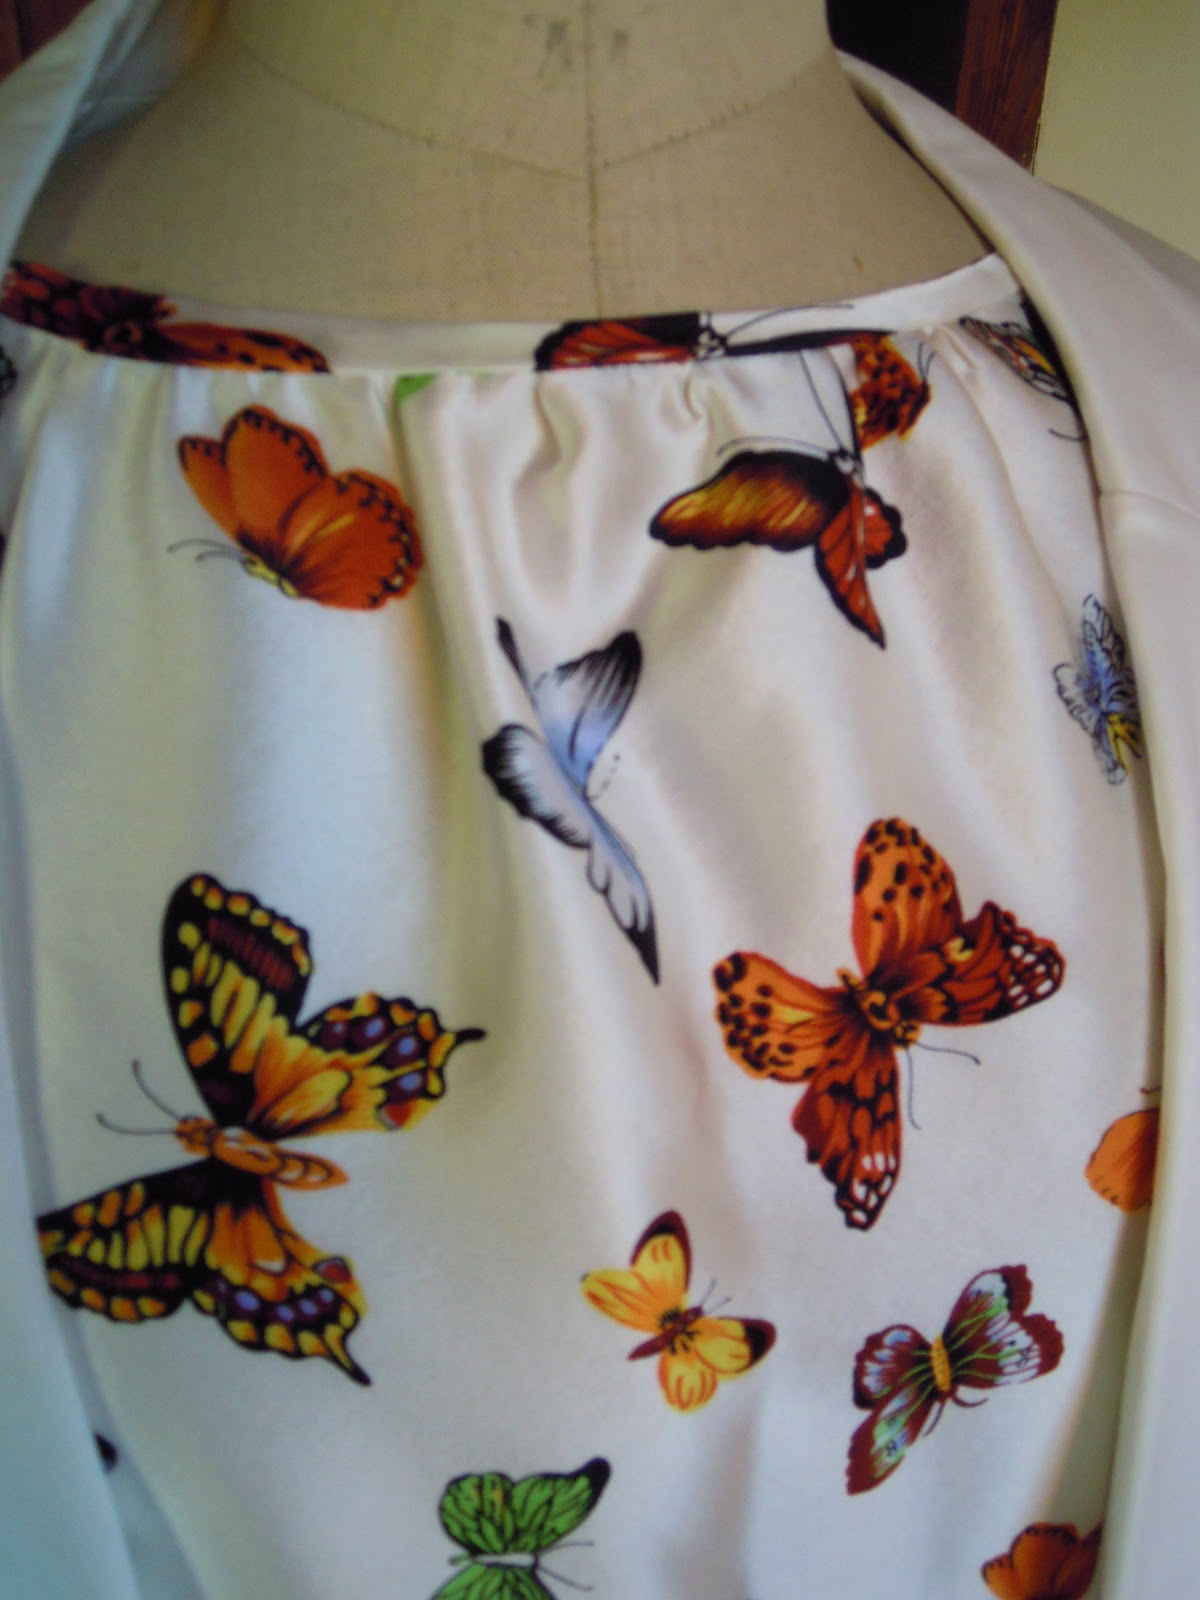
Butterfly dress for graduation ceremony, Burda 115B, April 2011

Here's the other graduation number I sewed, in case (impossible!) it's hot as blazes on the day of the university ceremony of the eldest for whom thankfully I haven't had to sew since I made him a bathrobe ten years ago. He's a history major and a rower, and heads off to India this summer under a sponsored "entrepreneurial" scheme, then to Japan for an intensive language course. You can't keep a good Swiss-American down on the farm. Last summer he did a stint with NYC US Congresswoman Carolyn Maloney who sponsored and finally got  the 9/11 health care bill for the rescuers/responders passed.
 We love her for her determination to see justice done for the heroes of 9/11, and were thrilled that son was in the House to see that bit of history made. If you watch her presentation on YouTube, Kid made the US maps showing health-giver locations. Carolyn Maloney Zadroga Bill. Check out the Big Map!
Everybody in London is talking about Kate Middleton's influence on the popularity this season of white, but at my age I look like a mental-home nurse in all white. We'll pass over the fact that I feel like a mental-home nurse these days. Anyway...cruising Zara with daughter last April in Lausanne, I recognized a butterfly-patterned silk as coming from Thai Silks, made up by Zara in the neckline featured in dress and blouse versions in the April Burda.
Ain't that sweet, only if it were me and my kids, they'd be the ones leaning over me...
 I didn't like the unbound neckline used on the cover photo at all, but did like the variations with bound necklines and armholes. I ordered up the silk thinking to replicate the blouse, but found I could squeeze a whole dress out of my shipment. I made a second dress (just a column, really) from fine white silk and then bound the two together at the neck and armholes, finally stitching a tunnel for the elastic using the two layers of silks. Easy peasey.

Thursday, 9 June 2011

Summer events need happy clothes, Burda's lace tunic, 118 March 2011

I'm hoping that— unlike my last trip to England (see previous disaster saga in archives from last November about visiting my conducting kid) which started with a six hour delay for snow and ended up with me heading home one day late to the wrong city, again for snow— my trip to see eldest graduate from university will happen, and happen on time, without me waking up in a hotel in the wrong country.

This will also be a chance to host post-graduation ceremony two best friends who've always been there for me and my kids, because Dad won't be able to fly for health reasons. He himself will be limping to attend, on crutches, the simultaneous high school graduation of our daughter in Switzerland. Two graduations on the same day in different cities.

Just our luck, right?

I'm not sure which outfit to wear, but one item for the days in Cambridge/London is the lace tunic from Burda's wedding issue, which they ran up in a lurid green. I found a lovely remnant of lilac lace and, as you can see from the photos, made one style change: I used the finished lace edging as a style feature at both the hem and the sleeve edges by adjusting the layout. Less sewing for me, and more couture for the result.

Btw, I was surprised to see that this tunic was long and covers a lot of sins around the hips! To be worn with white trousers and a flesh-colored cami underneath.


I finished with French seams and bound the sleeves and neckline with flesh-colored satin, as the lace allows the finishings to be visible somewhat. 
I'm hoping that the color isn't too "old-lady," as I suspect that's why this piece of wonderful stuff was on deep discount. 
A really easy basic pattern that, as you can see, can go very formal with no work at all.

Back to editing my third volume of mystery thrillers for re-issue in paperback/Kindle. The garden is tempting me...

Friday, 3 June 2011

July Burda preview. I thought we were starting June, but...

Now some of you might have thought I disappeared down the same rabbit hole as the Selfish Seamstress and Bugglegum for Breakfast, two bloggers I heartily miss. No, I've been commuting all these months to a re-adaptation centre where my husband is recovering from three spinal operations. A long story, and nothing to do with sewing. The latest Burda has caught my mood, exactly:


 Burda has gone into mourning, as you can see. At least, that's all I can conclude with their July preview of black, black and as Henry Ford said about the Model T car, "Any color, as long as it's black." I suppose we should have seen this hot-weather-black coming in the Italian issue some months back which featured a lot of black cotton Dolce Vita numbers.

I've been sewing in my little free time, and I'll be posting a lace tunic from the bridal issue and one of the dropped-waist numbers Burda are so into these days next. I'll be wearing them over the weekend of my first-born's university graduation ceremony in the UK, which sadly, I have to attend alone. Dad can't fly, and we're all feeling sad, but that's life.

In the meantime, I'm also reissuing three Asian thriller mysteries this summer, The Handover Mysteries,  in paperback and e-book. (The second volume was published by Carroll & Graf in New York some years ago.) For reasons that are complicated, they're coming out in reverse order, so watch this space. . .

Happy Summer, Everybody!